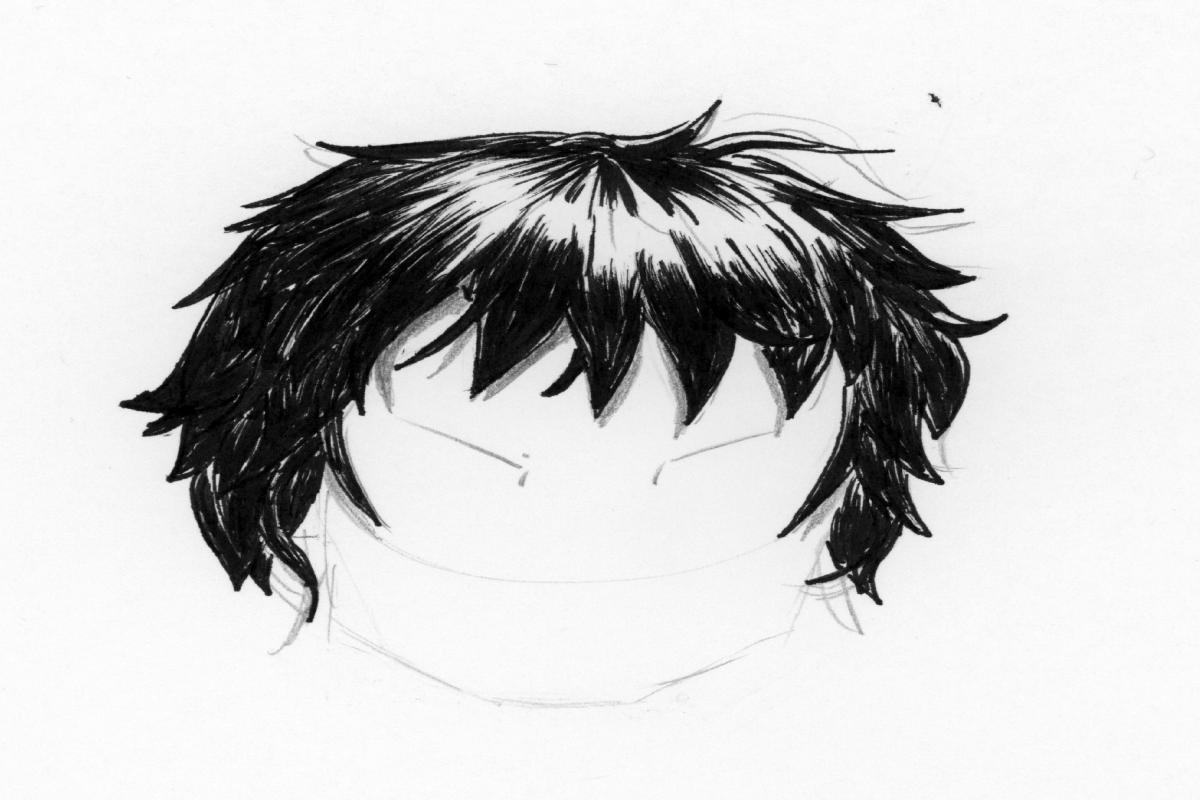
Hair is like leaves growing on a head, or bananas or even flames depending on the character you draw!
To draw manga hair, the first thing you need to know, as for almost any kind of drawing, is that you should not draw all the hair one by one! No, absolutely not! The reason is simple: a hair is even finer than the finest line of all your pens and feathers, so for this line to really exist, you would have to draw a head even bigger than life size, you would need a giant sheet of paper!
So let's drop all the hair, zoom out, and there we see strands! Groups of hair. And these strands are like leaves that grow on the head, like on a plant, the leaves are not all the same, they are directed in different directions, they are not all of the same shape, they vary. So let yourself go!
To draw these groups of hairs, you must first train your hand and wrist to make nice curves. You will soon realize how soft and light the hair is, just like your gesture.

Then proceed in steps:
1) Sketch a face, then place a hair rallying point (pink dot on the example).
Be careful, this point must be above the circle of the head!
2) Start to make your strands, as if the line started from the point and came back to the point but making a rounding, it is necessary to respect the rounding of the head and the volume of the hair.
There are three zones of hair:
The bangs, the front, the strands that fall on the forehead.
The sides, the hair that grows on the sides and falls on the shoulders or slightly upwards.
The back, the hair that is above the rallying point.
3) There are also sometimes other types of hair, crazier that start from the point and go down the curvature of the skull and wham! They snap back at the end.
You can try different types of hair, flat, straight, wide locks, thin locks, even try the flaming locks of Dragon Ball Z characters or the triangular locks of Naruto. For these characters, it's the other way around, you place the rallying point between the eyes and the locks go up. Also try straight bangs, making the strands more square on the ends, rather than pointed.

4) Then go to the inking. Train the gesture well, fluid and energetic, made of nice smooth lines, without jerks, it's not a big deal if the line doesn't follow the sketch line very precisely. Draw especially the end of the strands.
5) For the coloring, in the manga type drawing, we like the reflections on the top of the head, start by coloring the end of each strand by going up towards the rallying point but by leaving white a crown area on the top of the head. On the example, the hair has been worked with a brush pen which allows you to disperse on the end of each line and make a hair texture. You can also leave a white highlight on the top of some strands and color only the part underneath to make a shading effect.
6) The last step is shading. Depending on the light source, draw shadows under each strand on the forehead. You can do this directly with the darker skin color you chose for the shadows on the face.
And there you go, having endless fun creating all kinds of highlights and haircuts! If you want to perfect these techniques, there is nothing better than taking a comic book/manga drawing class to learn how to draw your favorite characters. Apolline offers courses in Lausanne, Morges, Montreux, Bienne and Delémont. And to deepen your knowledge even more, you can take part in the comic/manga drawing camps that take place in all the French-speaking part of Switzerland during the school vacations!
Discover also: How to draw a hand, How to draw feet, How to draw a nose, How to draw a body, How to create a comic/manga character and many other articles.
